Tuesday, November 6, 2012

Toasty Toes 2

These were made following the pattern in the previous post  with the following changes:
Instead of a chunky weight yarn, an aran weight (somewhere between a 4 and 5) was used,
Instead of increasing to 8, increase to 12 and work 12 rounds of ribbing and 18 rows of ribbing,
The strap was made a stitch or two wider.
Bow was made using U.S. size 3 needles and sock weight yarn by casting on 10 sts, work garter st (knit every row) for 6 inches, bind off, fold in half, stitch to gather and attach to slipper.


Friday, November 2, 2012

Toasty Toes Mary Janes

Toasty Toes Mary Jane Slippers Pattern
Toasty Toes Mary Jane Slippers

     These fit a toddler size 7 quite loosely but not dangling loose prior to felting (see photo). They fit with toe wiggling room after felting. For what it's worth, felting was done in washer with lukewarm water.

Materials List
4, U.S. size 9 dpns (double pointed needles)
Less than 50 grams of chunky yarn
(The variegated ones were made with Plymouth Galway Chunky Paint (bulky weight), (see below for other options)
1 marker
Darning needle

2- ⅝”buttons
(or, 2 complete snap closures or, velcro closures)
Scissors

Instructions

Cast on 3 sts
(You will be working in the round so be sure stitches are not twisted and connect stitches by continuing on with the work and not turning)
Round 1
Place marker to indicate end/beginning of row. You will need to slip marker after last stitch and before working first stitch of the next round while working in the round.
k1fb onto a dpn (this will be needle 1), k1fb onto another dpn (needle 2), k1fb onto a third dpn (needle 3) -(6 sts total-2 on each needle)
Round 2
k1fb in each st around - (12 sts total-4 on each needle)
Round 3
needle 1 - k1, k1fb in next 2 sts, k1.
needle 2 - k1, k1fb in next 2 sts, k1.
needle 3 - k1, k1fb in next 2 sts, k1.
(18 sts total-6 on each needle)
Round 4
needle 1 - k1, k1fb, k2, k1fb, k1
needle 2 - k1, k1fb, k2, k1fb, k1
needle 3 - k1, k1fb, k2, k1fb, k1
(24 sts total-8 on each needle)
Round 5-12
work all 3 needles in k1, p1 ribbing. (24 sts total)
Round 13
needle 1- k2 (the first of which will remain while the 2nd one will be used when binding off 6 sts), bind 6 sts. Place last st onto needle 2 to be worked with the others and the first st from needle 1 can be placed onto the end of needle 3. You will no longer need the marker. Work all remaining sts, including the already worked 1st st from needle one that was placed on the end of needle three (I didn’t notice any quirky issues from that stitch having the additional work) in k1, p1 ribbing following set pattern of previous rounds. At this time, the stitches may be worked straight on just two needles. (18 sts total)
Row 14 -28
Work in k1, p1 (or p1, k1-doesn’t matter as long as the ribbing pattern has been established and your row count is accurate) ribbing following pattern set by previous rounds. (18 sts total)
Row 29
(The inside of the slipper should be facing you as you begin this row)
         Purl across
Row 30
(this is actually only going to be a half row)
k 9 sts.  Leave remaining 9 sts unworked.  Leaving a long (10-12 inches) tail, cut yarn.
Thread end of yarn that is attached to slipper through darning needle. Fold the piece in half so that the two needles and the stitches line up and the right sides are together.  Seam the two halves of the back of slipper together using the Kitchener stitch (helpful video tutorial on the Kitchener stitch).

Strap
(the strap length will vary depending on the pudginess of the intended wearer’s foot.)
Decide where you’d like the strap to be.
With outside of shoe facing you, pick up 5 sts.
slip 1st st of each row.
Work in k1, p1 ribbing (take care to p1,k1 on alternate rows).
Work in ribbing until strap reaches just beyond top edge of opposite side of slipper if wanting to use a button closure.(Feel free to use your favorite buttonhole method)
knit or purl first st, bo 3 sts, knit or purl last st. Turn.
knit or purl first stitch, cast on 3 stitches, knit or purl last stitch.  Work 1-2 more rows. Bind off.
If using snaps or velcro closures, measure to midway on the opposite side of slipper and bind off

(the off-white ones were made with Fisherman’s yarn( aran weight), ( it being a lighter weight yarn than is the chunky, adjustments were made by making increases to 12 sts per dpn and, 12 rounds of k1 p1 rib pattern) -both  the Plymouth and the Fisherman’s are 100% wool- if felting is desired, choose 100% wool yarn that is NOT superwash)

Disclaimer:
While there are many patterns for Mary Jane-type slippers available, the pattern for these slippers was created by me. I do believe I have included all details. Please, don’t hesitate to let me know if you find something amok.


Sunday, September 30, 2012

If a Picture Paints a Thousand Words...

...Then a video paints a thousand times a thousand words. Multiply that number by the number of times needed to watch it in order to gather enough information and what you'll have is a bridge across a language barrier to an incredibly adorable child's sweater.
     A generous member of YouTube shared how she made a sweater.  She has other video tutorials as well.  The ones I clicked on were in a language other than English.  Below is the video from which I made the latest sweater.  I don't know if it is exactly the same but it is close enough for me.

A link to her video, http://youtu.be/EJrpN5zQEK4

Here's my version of the sweater from information viewed,

Friday, September 7, 2012

A Token of Affection

     A while back, I purchased a second-hand 1970's era liquor cabinet.  I wanted to strip it of its dark finish that was in near perfect condition and repaint it an off-white and possibly line certain areas of the inside with some toile wallpaper I'd bought several years ago.  The piece was going to be more down-to-earth and country-looking instead of intimidating and gloomy-looking as it had when purchased.  This cabinet was going to be MY creative storage area for crafting supplies.
     The transformation in appearance hasn't happened.  I became so thrilled at being able to organize some of my supplies that I began arranging them inside the cabinet directly after it received a top to bottom to top, inside out outside in scrubbing.  The addition of the supplies, and cuts of fabric intentionally hung over one of the upper doors as well as being displayed in neatly folded stacks helped to soften the cabinet's appearance and lended to its' charm.
     I have always been drawn to and prefer the more 'down home'-looking furnishings and old farmhouses with their well-worn wooden floors that seem to say, "whatever you dish out, I can handle."  This is where my husband and I disagree.  He prefers a more refined look to furnishings and homes that are new and untouched and equipped with high-tech conveniences.  I'm not sure if he tolerates my preferences or tolerates my purchases.
     I was excited about this cabinet and hopes I had for its' transformation.  My face hurt from smiling.
     Not more than two weeks after I brought the cabinet home, my husband began working on a piece of furniture.  Because I'd made an earlier request, I thought he had started on kid-sized armoires for our grandkids.  I had requested the durability of pine to be used but he was using black walnut.  "I wanted them made of pine so they can really USE them."  Fine furniture screams, "Don't touch!"  "Hands off!"
     "I got this.  Go away so I can work." he tells me.  Everyday, he goes into his workroom and busies himself with this project.  I traveled with him on one of his trips to the lumber yard and over heard him tell the owner (actually, the owner's son but it's a family business and Pop is in his late 70's -early 80's) he was working on an armoire for me, to store my crafts in.  I was excited and concerned at the same time.  I was excited that he was making ME a piece of furniture and a piece of such quality as what he had been working on.  I was concerned because I wouldn't be able to USE it.  I would have to be careful with it.  I wouldn't be able to place hooks inside or out to hold objects, not like I would be able to with one found at a resale shop or garage sale or side of the road (I haven't resorted to retreiving items from the roadside but, there are some REALLY interesting items placed at the roadside.  I'm recalling an old rocker, one of those old wooden ones with plump cushioned seats and a pleated skirt that wrapped around just below the cushion exposing turned spindle legs and the rocker base and the back was partially cushioned as well with the area just above the shoulder area featuring smaller spindles matching those on the bottom.  That piece was tempting.  I could see it re-upholstered with a crocheted lace covering.), and forget putting paints or glues inside, they may spill!  I don't know what would hurt his feelings more, me not wanting to use it for my crafts because I don't want to mess it up or messing it up while using it for my crafts. 
     The armoire is turning out to be gorgeous.  He and I will have to discuss how and where this piece will be used.  Maybe he will put extra coats of some kind of protectant on it to keep it from the messes and horrors of crafting.  That would help tremendously.

     Here's the cabinet so far.


Thursday, August 23, 2012

Grandpa's Plum Tree

      It was like a yearly ritual with the neighborhood kids, the majority being related to me, that come Spring the watch was on.  A random, "See anything?" or "What's it doin'?" meant one thing, what stage was THE tree at.  THE  tree being an old plum tree in my grandparents' backyard.

     Grandpa planted that plum tree before I was born (okay, so maybe not BEFORE I was born but it was there for quite some time before I realized, "Heeeeeeeey!  That plant has 'things' growing on it!!!  Must. Look. Closer." It was the same thought process we all took regarding things that grew.  Remind me to tell you about the "Indian Cigar" tree...hmmmmm...yeah...  ) as something to tend to after his retirement.  I don't know why he chose a plum tree.  I don't recall the why ever being brought up.  By the time I was allowed to explore the neighborhood with the rest of the kids that tree was big enough to climb and dangle from.

     Dangle.  We did a lot of dangling when we were young.  The neighbor across the street had the best Sycamore tree for that.  The limbs grew almost like a spiral staircase, making it easy to reach the top and once flipped over not hit your head on the limbs below.  Perfect. That's another story though.   I couldn't talk about dangling, which we did in Grandpa's Plum, without thinking about that Sycamore and being compelled to mention it.

    Spring progressed as did our anticipation of the fruits of the tree and the letting out of school for Spring break and for the Summer.  Do you see, everything meant something and all the somethings, even though enjoyed separately, all meshed together.  The stages of the tree were a sort of clock.

     Blossoms appeared and were replaced by the beginnings of the best plums ever.  We all agreed, they don't get picked until they're at least the diameter of a silver dollar and they had to be eaten in the tree and not taken out of the yard.  Once the blooms disappeared, the race was on for bragging rights as to who would eat the first plum of the season.  Like playing Spades, once a trump was played it opened the field for all trumps to be played, or in the case of the tree, once that first plum was eaten, they could all be eaten but, the size and location still applied.  So, most times, bragging rights were given after eating a green, I mean GREEN, REALLY GREEN, plum.

     From time to time, although nothing outside of where we were at the time existed, I think now of what the neighbors thought of 10-15 kids in a Plum tree and it makes me giggle.  What would you think if you looked out your kitchen window and seen a tree full of kids?  It would surely make me smile.
     While getting our bellies full off the plums, Grandma, not Grandpa but, Grandma would come out of the back door, hollering for us to"... get out of that thar tree 'fore yer Granddaddy comes after you! Ya hear me?!"  We'd all laugh, not at Grandma really but, more because we knew Grandpa didn't care one way or another whether we were in that tree or not.  He'd smile and wave to us while we were up there.  We took off nonetheless.

    My grandparents weren't a lovey-dovey-hand-holding pair at least not that anyone would be witness to.  There was a lot of picking and fussing (Grandpa picking and Grandma fussing) between the two.  Things may seem like they go unnoticed by kids but they don't.  They just don't discuss them.  Why would they?  It meant nothing to me at the time to see Grandpa smiling as he shuffled away from Grandma after he finally got her mad enough to start fussing.  Reflecting on it now though, it means a lot.  I know they loved each other and made each other happy in their own way.

   Grandpa planted the Plum tree and Grandma looked after it.  I recall him smiling (like a, "that's my woman!" kind of look) one time she got onto us about being in the tree.  We waved at him and he waved back at us with a smile as we scurried by.  She'd turn and go back inside knowing she'd done right by Grandpa and his Plum tree.

    In retrospect,  I think that Plum tree represented them and their relationship.  I reckon one would just had to have been there.

I miss them.

Tuesday, August 7, 2012

The Letter Zeeeeeeeeroooooo!

   A while back, I attempted to get an online extension on a library book.  For whatever reason, the password wasn't working and after trying different combinations (although the password was written down and verified with the librarian at the time it was initially set...in person even) I called the library.  They gave me an extension on my book but said my password couldn't be addressed over the phone.  Two weeks later, I return the books and seek the help of the librarian at the desk.  I state that I'd like to reset my password. Here's how it went,
Librarian- "What would you like it to be?  It can be anwhere from 4 to 8 alpha-numeric characters."
Me- "2-4-4-the letter zero-7-1."
Librarian- "Would you like that to be the number zero?"
Me- "I thought you said it could be letters or numbers."
Librarian- "That's right."
Me-  "Okay then, 2-4-4-the letterrrrrrrr zeeeeeeeeeerooooooooo (complete with fingers forming the letter)-7-1."
Librarian- "There is no letterrrrrrrrrr zeeeeeeeeeerooooooo.  There's the number zero....would you like that?"
Me- Looking dazed and confused briefly and I felt my head actually as the gears clicked into place which was more like a KA-LUNK! when I realized what I'd said and what she was explaining.  "Awe geez!  The letter o...small letter o.  (laughing visibly at myself) No wonder I was having difficulty with my password...I was using the letter zero!"
     I would blame it on Monday but really, it could've been any day.  I think that has been my most public show of a need to have my brain burped in quite some time though.

Saturday, August 4, 2012

8 lbs of Yellow Cotton Yarn!

     Jiminy Crickets! What was I thinking?
     Okay. I was thinking it looked light enough that I could alter items made with it with dyes and probably can just it won’t be as true a color had it been white.
     It’s a LOT of yarn and it was an awesome deal on it and I wanted to make some more things from cotton and and and and
     One headband is
crocheted (pattern by Tina Rodriguez) the other knitted (pattern by Teresa Harmon). They and many others can be found on Ravelry Dot Com


I Am NOT A Hoarder!

           Although, I do have hoarding tendencies.  I save trash that can be useful.  I do toss out stuff if I've not gotten any closer to using it within a few months.  There's one item I find particulary difficult to throw out...laundry detergent boxes.  I'm thinking, it's probably because of some incredibly beautiful project I'd seen before that used one.
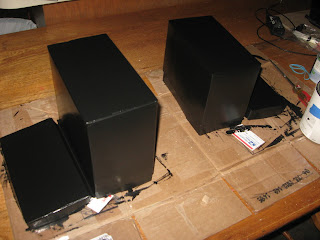
          I want to turn these into containers for yarn projects in progress so they can be transported and worked on on-the-go.


     Clean boxes inside and out with a VERY slightly dampened cloth or papertowel.
Sand the glossiness off. Wipe off accumulated dust with a Very slightly dampened cloth or paper towel.

Choose a base color and paint.  Paint several light coats, allowing each to dry before applying the next coat.

Choose image(s), position and adhere to box.  Get as creative as you'd like by adding painted details, beads, buttons, ric rac.  You now have a nice storage container.  Add a handle and the contents can be easily transported.  Line the inside, if desired and the contents will be extra protected.